Monday, March 15, 2010

Easter Egg Ornaments

Remember this Easter Tree? Well, I have some fun Easter Egg Ornament ideas for you! They're inexpensive, cute and your kiddos will love to help!

What you will need:
  • 2-3 different colored or patterned Easter scrapbook paper, or just whatever you may have on hand.
  • 5-6 styrofoam eggs (I found these at my local craft supply store w/the other styrofoam stuff)
  • Mod Podge
  • paint brush
  • spring colored yarn
  • straight pins
  • ribbon
  • scissors
  • faux bird (optional)

1. Have your cute kids start by ripping up the colorful Easter paper into tiny pieces (the smaller the better).

2. Apply Mod Podge to the top part of the egg with a paint brush and then have your kids put their small pieces of paper on the Mod Podged part. Then brush the top of the paper with Mod Podge and allow to dry. When dry, Mod Podge the other side of the egg and apply more paper, followed by the Mod Podge over the paper. Allow to dry.

3. For the yarn eggs, Mod Podge half of the egg and start wrapping the yarn around the egg, starting in the center. When you get to the end of the egg, cut the yarn and allow egg to dry. When dry, Mod Podge the other side of the egg and wrap yarn, starting in the center. Cut the yarn and allow to dry.

4. Now you should have an array of fun egg ornaments of different colors and textures.

5. Cut 6" pieces or ribbon for all of your eggs. Make a loop with the ribbon and stick the straight pin through the ribbon and then through the styrofoam egg.

6. There ya have it.


I put some of the loops at the top of the eggs and some of them at the bottom of the eggs, because I wanted them to be hanging different ways on the tree. See above picture.

Read more...

Friday, March 12, 2010

Painted Furniture

Painting furniture is probably the easiest and cheapest thing you can do to give it a new look and life. I have slowly been re-doing some of my furniture to revive it and make it more my style. First up is my dining table.

Before:

After:
I love it! I love red!

Next up is my dresser. I like the traditional look with classy cherry furniture. But I'm ready for a new look.

Before:

After:
Black! And yes, I love it! I also updated the hardware because I was not digging the brass handles.

For both of these projects I: primed with Kilz primer, painted at least two coats of paint (more with the red table), and then finished off with a coat of poly semi-gloss. And no, I didn't sand a thing. The primer is great and can be put on without sanding.

Read more...

Wednesday, March 10, 2010

Creative Organization for Small Spaces

We are currently renting a three bedroom home and it's the smallest house we have lived in so far. We also have more people in our family then we ever have before (seven to be exact). Soooo . . .I've had to be creative about how to make everything fit! I realize that a lot of these ideas are no-brainers, but that's okay. Sometimes I see ideas that seem so obvious and I would have never thought of them if someone hadn't pointed them out.

Tiny pantry and not many cupboards so I hung a spice rack on the pantry door along with one of those over-the-door shoe holders. Love those shoe things by the way! I have one on almost every door and none of them have shoes in them!

There's this tiny space in the pantry that isn't easily accessible but still usable so I put stuff that I don't use very often in some gallon size baggies and pinned them to the wall.

I usually keep this stuff (tin foil, ziploc baggies, etc.) in a drawer but I only have two drawers! So more over the door storage to the rescue!

If I had a toy room obviously I would put the toys in there. So the closets will have to do. Again, they're small so I use some plastic shelves that I picked up years ago to keep things organized and vertical in the closet.

I am totally anal about "stuff" showing. Whether it's kid stuff, electronic stuff, computer stuff; I like things put away behind doors. Especially when it's mix matched toy storage and a plastic toy kitchen. Solution: a shower curtain and a sheet. What does that make? A cute little hide away for the kids and a way to close off the stuff.


I never seem to have enough dressers for the fam. But then, I don't have the room for them right now. So every single bed in our house has a bunch of under-the-bed clothes bins. Also, bed raisers rock the house. They give you a lot more room to hide junk store things neatly!

Again with the over-the-door shoe organizer. Did I mention that I love these things? This one is in my laundry/office area. (Yes, I have a laundry/office area, but that's another post). It holds office supply stuff like; stapler, push pins, paper clips, pens and pencils, crayons for the kiddos, post its, paper.) All right there and easy to reach. And out of the way as well.

Obviously more space would be nice! But until that happens, these clever storage ideas are working for me!

Read more...

Tuesday, March 9, 2010

Wire Hanger Easter Tree

This Easter Tree is easy to make and what's even better is, it's CHEAP to make too!! I love trees; especially holiday trees. Trees make me happy. Just follow the step by step directions below!


What you will need:
  • 4-5 wire hangers
  • 6" terra cotta pot
  • 1 block of floral foam around 6" in size
  • white spray paint
  • bright green paint
  • dried sheet moss
  • heavy duty wire cutters
  • pliers
  • paintbrush
  • 3/4-1 yard of ribbon
Gather unused wire hangers from around your house. Come on, no one uses wire hangers anymore. This is a great way to RECYCLE, do your part, go green. Okay, that might be pushing it a little.

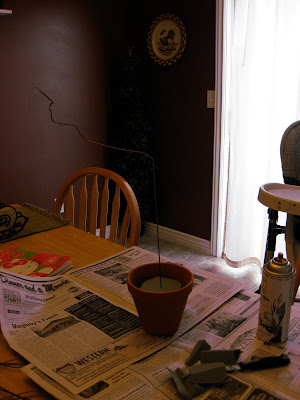
Start by cutting apart your floral foam with a knife, so it fits nice and snug in the pot. If it doesn't fit as snug as you would like, use some glue to secure it. Using your pliers, start untwisting the hangers. Using the heavy duty wire cutters, cut your first hanger right above one of the large bends (if you were looking at your hanger in it's entirety, the large bends I'm talking about are the two bottom corners of the triangular shape). The first branch is about 22" tall. Stick the piece of hanger in the foam. Now cut each branch at different lengths and stick each piece in the foam in varying directions. I have a total of 5 branches on my tree.

Spray paint your entire tree, pot included and let dry. Then tie with the ribbon. The ribbon will help hold the branches in place.

Mix the bright green paint with some water to make a white wash or a green wash to paint over the white terra cotta pot. You want the white to show through like in the picture.

Last, glue some dried sheet moss at the base of your tree and you're finished! Now you have a beautiful easter tree!

But wait! What about the ornaments?

I will show you how to make these little beauties very soon!

Stay tuned!

Read more...
Related Posts with Thumbnails

About This Blog

the clever chic is dedicated to bringing wonderful ideas together in one spot; craft ideas, decorating ideas, organizing ideas, cooking ideas, parenting ideas, etc. it's basically a melting pot of inspiration!

  © Blogger templates Newspaper III by Ourblogtemplates.com 2008

Back to TOP